| .github | ||
| .husky | ||
| cypress | ||
| keycloak-theme | ||
| mocks | ||
| public | ||
| src | ||
| themes | ||
| types | ||
| .dockerignore | ||
| .eslintrc.js | ||
| .gitignore | ||
| .prettierrc.json | ||
| CODE_OF_CONDUCT.md | ||
| CODING_GUIDELINES.md | ||
| cypress.json | ||
| Dockerfile | ||
| get-version.sh | ||
| import.mjs | ||
| jest.config.ts | ||
| jest.setup.ts | ||
| LICENSE | ||
| package-lock.json | ||
| package.json | ||
| postcss.config.js | ||
| README.md | ||
| realm-settings.png | ||
| release.sh | ||
| security-admin-console-v2.json | ||
| set-version.sh | ||
| snowpack.config.mjs | ||
| start.mjs | ||
| tsconfig.eslint.json | ||
| tsconfig.json | ||
Keycloak Admin Console V2
This project is the next generation of the Keycloak Administration Console. It is written with React and PatternFly 4.
Development Instructions
For development on this project you will need a running Keycloak server listening on port 8180.
-
Start keycloak
- Download and run with one command
$> ./start.mjs - or download Keycloak server from keycloak downloads page unpack and run it like:
$> cd <unpacked download folder>/bin
$> standalone -Djboss.socket.binding.port-offset=100
- Download and run with one command
-
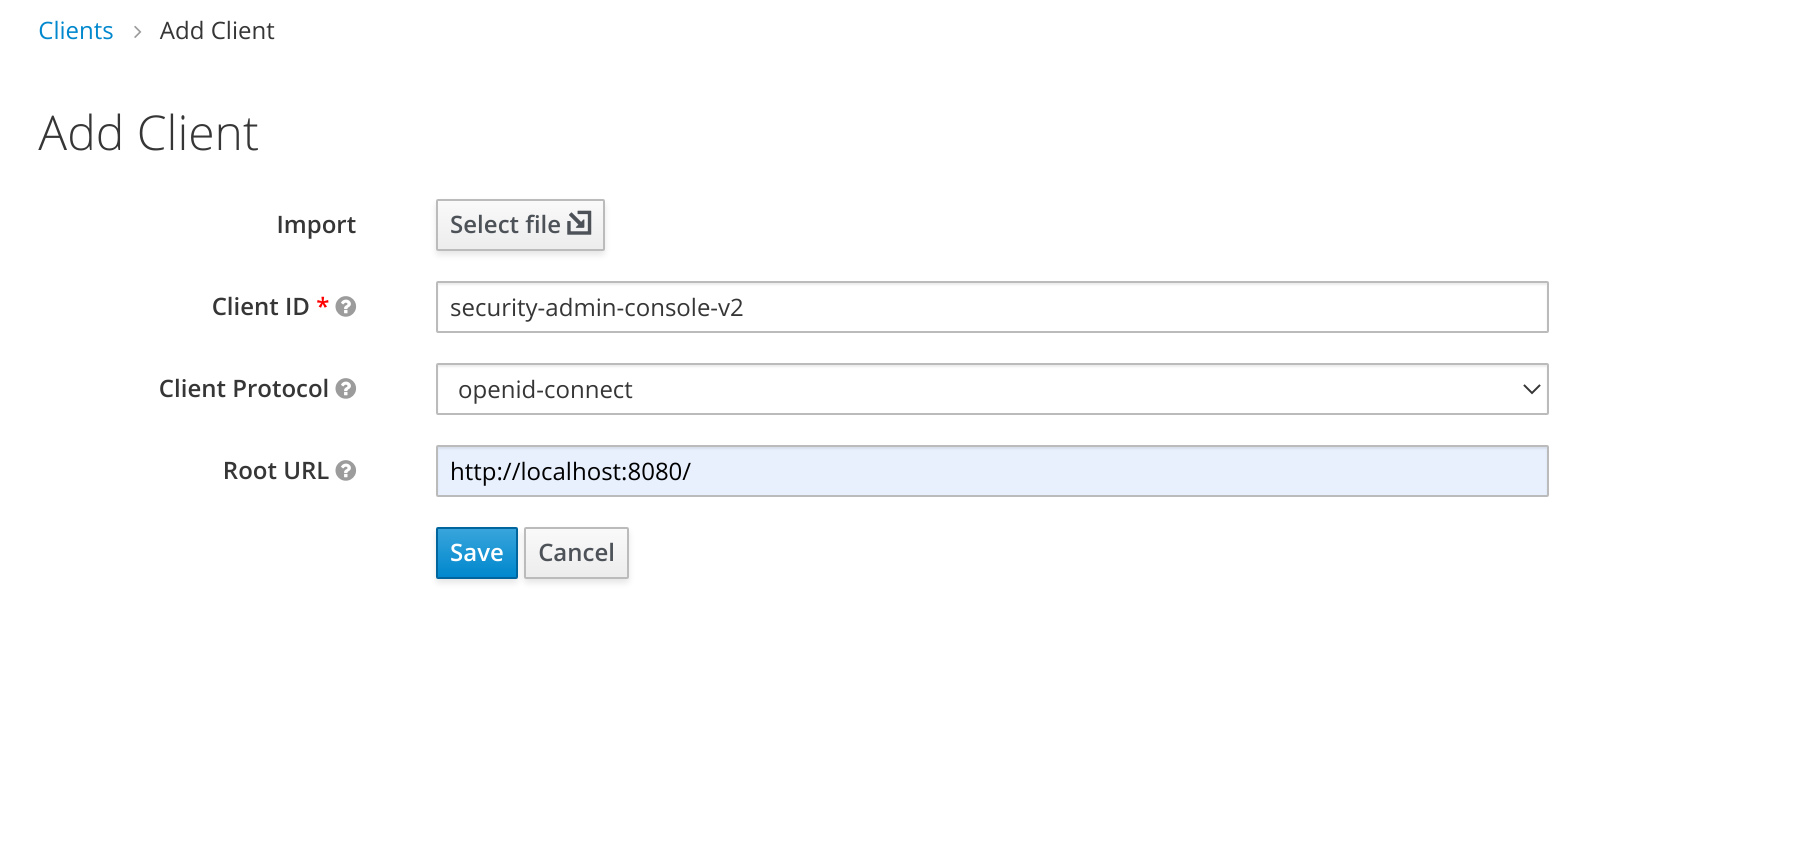
Go to the clients section of the existing Keycloak Admin Console and add the client
-
Install dependencies and run:
$> npm install
$> npm run start
Build and run through Docker
git checkout git@github.com:keycloak/keycloak-admin-ui.git
cd keycloak-admin-ui
docker build -t keycloak-v2 .
docker run --name keycloak-v2 -d -p 127.0.0.1:8080:8080 -e KEYCLOAK_USER=admin -e KEYCLOAK_PASSWORD=admin keycloak-v2 -Dprofile.feature.newadmin=enabled
You can reach the new admin interface at http://localhost:8080. Then go to Realm Settings --> Themes and set Admin Console Theme to keycloak.v2.
If your Keycloak instance is not on localhost:8180, create a file .env with the following:
KEYCLOAK_ENDPOINT=https:\/\/remoteinstance.keycloak.com
Building as a Keycloak theme
If you want to build the application using Maven and produce a JAR that can be installed directly into Keycloak, check out the Keycloak theme documentation.
Linting
Every time you create a commit it should be automatically linted and formatted for you. It is also possible to trigger the linting manually:
npm run lint
Theming
It's possible to theme the Admin UI interface, this is useful if you want to apply your own branding so that the product looks familiar to your users. The Admin UI comes with two built-in themes called keycloak and rh-sso, by default the keycloak theme will be used when building the application.
This behavior can be changed by passing in a THEME_NAME environment variable, for example if wanted to build the application using the rh-sso theme we can do the following:
THEME_NAME=rh-sso npm run build
And likewise if we wanted to start a development server with this theme:
THEME_NAME=rh-sso npm run start
To make it simpler to build the rh-sso theme there are some shorthand NPM scripts available that you can run instead:
# Run a production build with the 'rh-sso' theme
npm run build:rh-sso

# Or for development
npm run start:rh-sso
Creating your own theme
All themes are located in the themes/ directory of the project, if you want to create a new theme you can create a new directory here and name it the same as your theme. Copy the files from the default theme here and customize them to your liking.
Keycloak UI Test Suite in Cypress
This repository contains the UI tests for Keycloak developed with Cypress framework
Prerequisites
Keycloak distributionhas to be downloaded and started on 8081 port.
note: the port in at the test suite side in cypress.json or at the Keycloak side, see Keycloak Getting Started Guide,npm package managerhas to be downloaded and installed.
via Cypress Test Runner
By using npx:
note: npx is included with npm > v5.2 or can be installed separately.
npx cypress open
After a moment, the Cypress Test Runner will launch:
via terminal
By executing:
$(npm bin)/cypress run
...or...
./node_modules/.bin/cypress run
...or... (requires npm@5.2.0 or greater)
npx cypress run
To execute a specific test on a specific browser run:
cypress run --spec "cypress/integration/example-test.spec.js" --browser chrome
note: the complete list of parameters can be found in the official Cypress documentation.
Project Structure
/assets (added to .gitignore)
  /videos - if test fails, the video is stored here
  /screenshots - if test fails, the screenshot is stored here
/cypress
  /fixtures - external pieces of static data that can be used by your tests
  /integration - used for test files (supported filetypes are .js, .jsx, .coffee and .cjsx)
  /plugins
    - index.js - extends Cypress behaviour, custom plugins are imported before every single spec file run
  /support - reusable behaviour
    - commands.js - custom commands
    - index.js - runs before each test file

/cypress.json - Cypress configuration file
/jsconfig.json - Cypress code autocompletion is enabled here
note: More about the project structure in the official Cypress documentation.
